Latest Posts

4 reasons to love chia seeds, plus my favorite chia recipe

Last weekend, my niece and mom asked me about chia seed. They knew it was something healthy to eat, but they weren’t sure why, or how to use it.

Fortunately, when I worked at Delicious Living we answered this question, complete with recipes. Here’s a roundup of chia information from DL, plus my favorite chia seed recipe.

  1. Chia seeds are easy to use. Unlike flaxseed, you don’t have to grind chia to reap its benefits, and it’s incredibly versatile in recipes.
  2. Chia seeds are full of nutrients. Gram for gram, chia contains more fiber than flaxseed and more calcium than milk, as well as significant protein, potassium, and plant-based omega-3s.
  3. Chia seeds last a looong time. In the refrigerator, they’ll keep for up to two years.
  4. Chia has its own day. March 23 is National Chia Day — who knew? I love this chia infographic made in partnership with the fabulous Mamma Chia, maker of USDA certified organic chia drinks and bars.

My favorite recipe with chia seeds takes just a few minutes to put together, and then it sets in the fridge for a few hours. It’s gluten free, dairy free, vegan, and is sweetened with dates — no refined sugar.

Chocolate-Coconut Chia Pudding

Chia pudding FullSizeRender

Chocolate-Coconut Chia Pudding

Remove pits from 6 medjool dates  and soak dates in 1/2 cup hot water to soften.

Combine dates and soaking water in a food processor with 7 ounces coconut milk, 1.5 tablespoons unsweetened cocoa powder, and a dash of salt. Blend until smooth.

Transfer to a medium-large bowl and stir in 1/2 cup chia seeds (white or black) and 2 cups unsweetened almond milk. Refrigerate until set, several hours or overnight. Top with berries if desired.

Couldn’t be easier!

A few more chia recipes I love:

Watermelon-Chia Smoothie

Chia-Crusted Tofu

Chocolate-Date-Nut Bars

Fruit Skewers with Cardamom and Mint

How do you use chia? Post a comment below!

Photo credit: Ariane Phipps-Morgan

Christmas recipe fix: Raisin Mumbles cookie bars

Last week, a dear friend of mine sent me a blurry photo and recipe with this hilarious comment:

“This recipe is my Christmas recipe nightmare! A favorite of my husband and youngest son but a living mess to make EVERY SINGLE YEAR. My son and my sister-in-law made it this year and this is the debacle. Burned on the edges, underdone in the middle, left the oven a smoking mess, and the dog had a go at it as well. This recipe is very old—handed down from Grandma Betty. It certainly could stand some updating!”

She added: “And it’s too many cookie bars! No one can eat an 11 x 15 pan of raisin mumbles!!” (To which I replied, genuinely, “Oh, it’s supposed to be bars?!”)

I’ve often said that I love to cook but I don’t really love to bake—baking typically requires precision, not my forte. But cookie bars seemed doable … and  the challenge enticed me. Here’s what happened.

Skip to the finished and delicious recipe below!

I started by cutting the recipe roughly in half—and I cut the sugar even more, because the original had a whopping 5 cups total and I thought even half of that would overwhelm the rest of the recipe’s flavors.

I decided on an 8×8-inch pan and, instead of foil, I chose parchment paper, which I knew would release from both the pan and the bars after cooking.

img_2033

Then I heated the raisin mixture, using a lot less water than in the original recipe and being sure to bring it to a gentle boil before reducing to a simmer, to ensure that the sugar would incorporate fully.

It turned out to be important to wait at least 20 minutes for this mixture to cool. As you can see, the heated raisins continued to absorb liquid and the final mixture wasn’t so soupy.

Making the crumble part was straightforward: Mix dry ingredients, cream butter and (a lot less) sugar, and then combine. After reserving one-third of this mixture for the topping, I pressed the rest into the pan, using a flat measuring cup to compress it.

Next, I spread the mostly cooled raisin mixture on top, crumbled the reserved crumble on top of that, and voila—ready to cook at 350 degrees.

I had no idea how long my revised version would take, but I figured the 25 minutes in the original recipe was an OK place to start—and then I just kept adding time until the top looked golden brown and the filling was bubbling around the edges, a total of 40 minutes.

img_2045

Now came the hard part: waiting for it to cool so I could take it out of the pan. The original recipe stated that the bars were “easier to cut if they are frozen,” so I deduced that cooling would be key to solidifying the layers. Once the pan was not hot to the touch, I put it in the fridge for about an hour to cool completely.

At that point they were ready to remove from the pan. Because some of the sticky raisin layer seeped into the corners, I ran a dinner knife around the pan edge (outside the paper) to loosen it, and then lifted the whole thing out onto a cutting board. Because the bars were solid and cool, it was easy to peel off the parchment paper without the entire block falling apart.

The moment of truth: I was so happy to see that the layers remained distinct and the cold bars cut nicely—and they taste terrific! Kind of like fig bars but even better.

img_2054

Here is the final recipe. Incidentally, I used regular flour, but I am sure this would work just as well with a gluten-free flour mix and gluten-free oats.

One last question remains: Why are they called mumbles??

Grandma Betty’s Raisin Mumbles

Makes one 8×8-inch pan | About 25 squares

Ingredients:

Raisin Mixture

12 ounces seedless raisins (about 2 1/4 cups)

1 cup granulated sugar

2 tablespoons all-purpose flour

1/2 cup water

2 1/2 tablespoons lemon juice

Crumble Mixture

1 1/4 cups all-purpose flour

1/4 teaspoon salt

scant 1/2 teaspoon baking soda

1 cup plus 2 tablespoons old-fashioned rolled oats

1/2 cup (1 stick) unsalted butter, room temperature

1/2 cup brown sugar

Directions:

  1. Line an 8×8-inch baking pan with two crosshatched pieces of parchment paper, leaving a few inches of overhang on each edge.
  2. Combine all raisin mixture ingredients in a saucepan. Bring to a boil, reduce heat, and simmer 5 minutes, stirring occasionally. Let cool for 20 minutes; mixture will continue to thicken as raisins absorb liquid.
  3. Preheat oven to 350 degrees. Mix dry ingredients in a bowl. Separately, beat butter and brown sugar. Add dry ingredients to butter mixture and mix well.
  4. Reserve one-third of crumbles mixture. Press remainder into pan. Top with cooled raisin mixture. Crumble remaining crumb mixture over raisins. Bake for about 40 minutes, until golden brown on top and bubbly around edges. Let cool, then refrigerate until completely cold.
  5. Run a knife around pan edges (outside parchment paper) to loosen from pan; using parchment paper, lift bars out of pan and transfer to a cutting board. Peel off parchment paper; cut bars while cold.

Try it and let me know what you think!

Kitul nectar: a new (old) organic sweetener

A few weeks ago, I received a sample of a new product called Cocotrella, made by Ceylon Pure. It’s a gluten-free, nut-free, sweet and luscious spread made with just two ingredients: kitul nectar (more on that below) and coconut butter.

Before I even got it into my mouth, Cocotrella’s impressive certifications caught my attention: USDA Organic, certified Fair Trade, Non-GMO Project verified, plus it’s naturally vegan and gluten free.

But the real payoff is the taste and mouth feel—even though it looks a little grainy, it’s fabulously smooth and melts on the tongue, with a just-right toasted caramel flavor and a hint of coconut. The company likens it to Nutella as a sweet spread, but I think Cocotrella tastes SO much better. It’s perfect for paleo pancakes or apple slices. And don’t judge me if I simply eat it with a spoon.IMG_0754

Traditional crop in Sri Lanka

Aside from Cocotrella being just plain delicious, the product immediately intrigued me because I’d never heard of kitul. Turns out it’s a fascinating crop with an interesting history and strong potential as an old-is-new, healthy, delicious, low-glycemic sweetener.

Farmers harvest kitul sap from the flower-cluster stalks of the kitul (aka kithul or kittul) tree, grown throughout Southeast Asia but tapped only in Sri Lanka (formerly Ceylon).

fishtail-palm-350121_1280

The kitul (jaggery palm) tree

(By the way, kitul nectar is also called treacle, but that’s a name used for any unrefined sugar syrup, whether sourced from dates, cane sugar, coconut, or other plant. Jaggery, the solid version sold in blocks, is a common sweetener in Southeast Asian foods.)

A traditional Sri Lankan crop for 2,000 years, kitul syrup was prized by ancient Sri Lankan royalty.  Harvesting kitul isn’t easy: Farmers have to climb the tree, make a cut in the flower stalk, and apply an herbal mixture that stimulates sap excretion. When the sap is ready, farmers climb back up to cut the stalk and extract the sap into a pot. (Picture maple-tree tapping … but 30 or 40 feet up in the air.) In its traditional form, this process is slow, laborious, and provides limited yield and economic return. It’s no wonder young Sri Lankan farmers weren’t flocking to this heirloom crop.

fishtail-palm-332409_1280

Kitul flower cluster

In recent years, the Sri Lankan government decided to help boost the craft of kitul production. As part of that effort, researchers came up with a nontoxic mixture that replaced the traditional herbal concoction; it more than doubled the sap yield and stimulated more trees to produce the sap. The inventors provided this new mixture and training free to interested tappers, hoping to revitalize this traditional industry.

Check out this article and fascinating video that describes kitul harvesting and processing. Even though the video isn’t in English, you’ll get an excellent sense of the process. (And yes, the farmer climbs the tree barefoot!)

Healthy sugar?

Reportedly, kitul is low in both glucose and fructose, making it a low-glycemic-index sweetener—a holy grail for everyone who has a sweet tooth, not to mention people battling diabetes and weight issues. However, I couldn’t find a way to verify that claim because “kitul” didn’t show up as a search result on the glycemic index site. Kitul nectar is certainly an unrefined sugar, so that has some benefit over refined white sugar; but it’s debatable whether trace minerals or other compounds really make a “healthy” difference.

Even so, I’d put kitul on par with its main Western competitor: maple syrup, which rates 54 on the glycemic index and is a current darling in paleo and other healthy circles. I love pure maple syrup, but kitul may be ready to give it a run for its money—and there’s certainly plenty of market space for truly sustainable and fair-trade sweeteners.

If you’re a Nutella fan, you might like to know that according to its brochure, Cocotrella packs 50 percent fewer calories, 75 percent less fat, and 70 percent fewer carbs per serving.

Ceylon Pure: A Mission-Based Company

I also did a little research into Ceylon Pure as a company, and I love what I see: It’s connected with Rural Returns Development Org, a nonprofit that works to alleviate rural poverty among Sri Lankan farming communities with market-based solutions, primarily systems to produce and market certified-organic, heirloom rice.

In addition to heirloom rice, Ceylon Pure has branched into organic coconut products to ride coconut’s current (and exploding) popularity.

I’ll be interested to see how this company and Cocotrella—my new favorite treat—take off.

What’s your favorite healthy sweetener? Have you heard of kitul? What do you think? I’d love to read your comments below!


3 surprising reasons to love the paleo diet

My article Mythbusting the Paleo Diet is now live on DeliciousLiving.com! Check it out and let me know what you think.

In case you haven’t heard of it, the paleo diet involves eating only foods that existed in the paleolithic, hunter-gatherer, pre-agricultural era. That means grass-fed meats and wild fish; fruits and vegetables, including their healthy oils; and nuts and seeds. Paleo eating eliminates all dairy, legumes, and grains. (Because it’s grain free, paleo is naturally gluten free.)

Here are 3 surprising reasons to love the paleo diet, which I learned while researching and writing the Mythbusting piece—and from my own experience.

1. The paleo diet may be crucial to weight loss.

Dave and I have been eating what we call “mostly paleo” for a few years now, focusing especially on the low-carb aspect. Dave combined carb-cutting with increased cardio exercise to lose weight. The results: After being a yo-yo dieter for most of his life, he lost 40 pounds and has kept it off. And his cholesterol, which hovered above 220, fell to 180. His doctor, who had been advising him to take statins to lower cholesterol, told him to keep doing whatever he’s doing.

To make our lives and cooking easier, I joined him on the mostly-paleo path. I’ve shed and kept off nearly 10 pounds.

We eat mostly paleo because I’m convinced that the typical Western diet’s reliance on starchy carbs, and especially sugar, is the real culprit behind obesity and, by extension, type 2 diabetes and heart disease. Here are just a few recent studies that back me up:

2015 meta-analysis in the American Journal of Clinical Nutrition found that paleo eating resulted in greater short-term improvements in five components of metabolic syndrome (a group of risk factors that make you more susceptible to developing diabetes and heart disease) than did the control diets. Specifically, the paleo diet improved markers for waist circumference, triglycerides, systolic blood pressure, diastolic blood pressure, HDL cholesterol, and fasting blood sugar.

2015 study in the European Journal of Clinical Nutrition states as its conclusion: “Even short-term consumption of a Paleolithic-type diet improved glucose control and lipid profiles in people with type 2 diabetes compared with a conventional diet containing moderate salt intake, low-fat dairy, whole grains and legumes.”

2012 study in Diabetes, Metabolic Syndrome and Obesity made an interesting link between the paleo diet and a healthy gut microbiota, proposing that a high-carbohydrate diet produces an inflammatory response in the gut and “may be the primary cause of leptin resistance [leptin is the hormone that signals the brain that you’re full] and obesity.” The study concludes that “a diet of grain-free whole foods with carbohydrate from cellular tubers, leaves, and fruits [that is, whole root vegetables and leafy greens] may produce a gastrointestinal microbiota [healthy gut bacteria] consistent with our evolutionary condition, potentially explaining … the apparent efficacy of the modern ‘Paleolithic’ diet on satiety and metabolism.”

2. The paleo diet offers tons of variety.

I realize there are a lot of very passionate paleo camps out there, but Dave and I are not paleo purists; we still have wine and cocktails every so often, and I won’t say no to a scoop of excellent ice cream on my birthday. But we have eliminated regularly eating common foods that are mostly carbohydrate: bread, pasta, rice, and especially sugar. And you know what? We really don’t miss those empty calories.

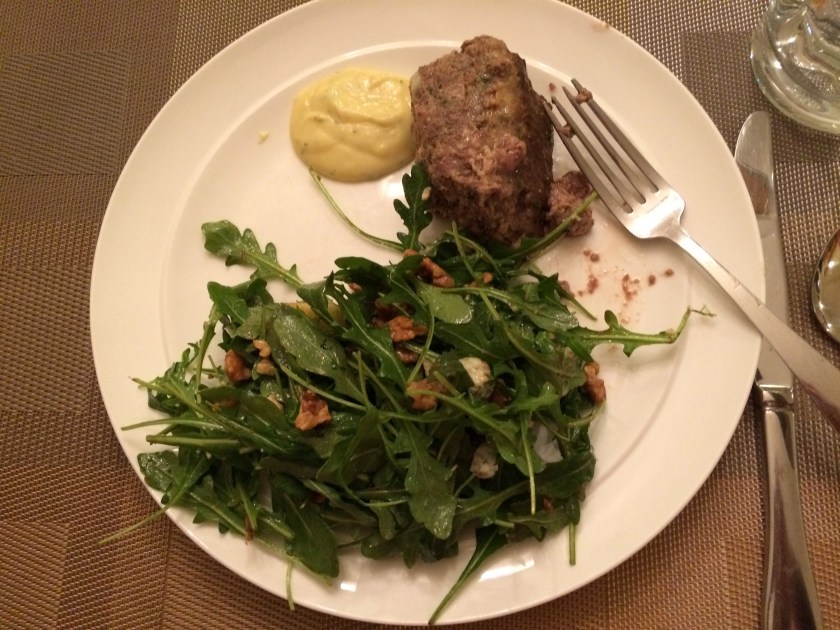
We are far from bored. In fact, we eat better than we ever did—lots of clean meat like wild game and organic chicken and fish, and tons of salads and vegetables. Without the fallback of bread and other grains, we come up with inventive dishes using the colorful wide world of veggies.

IMG_2169

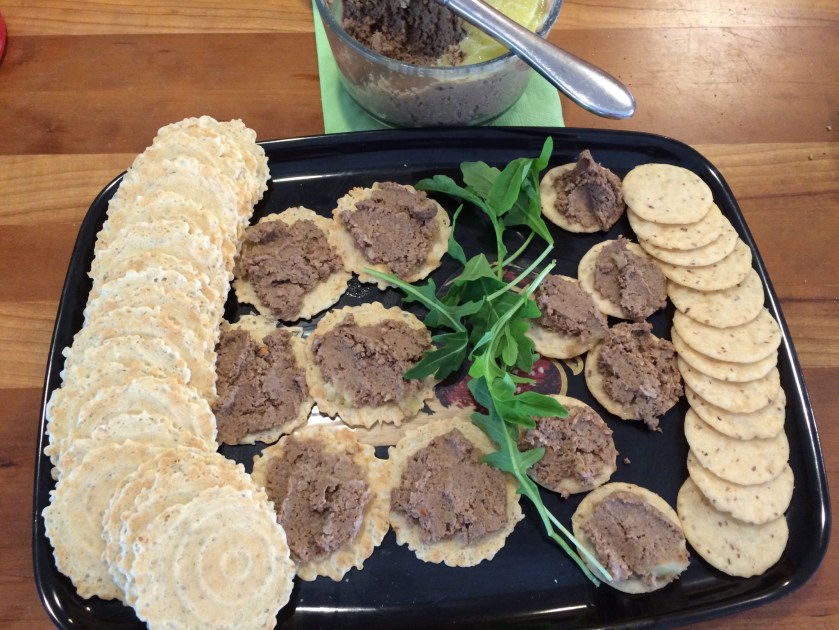
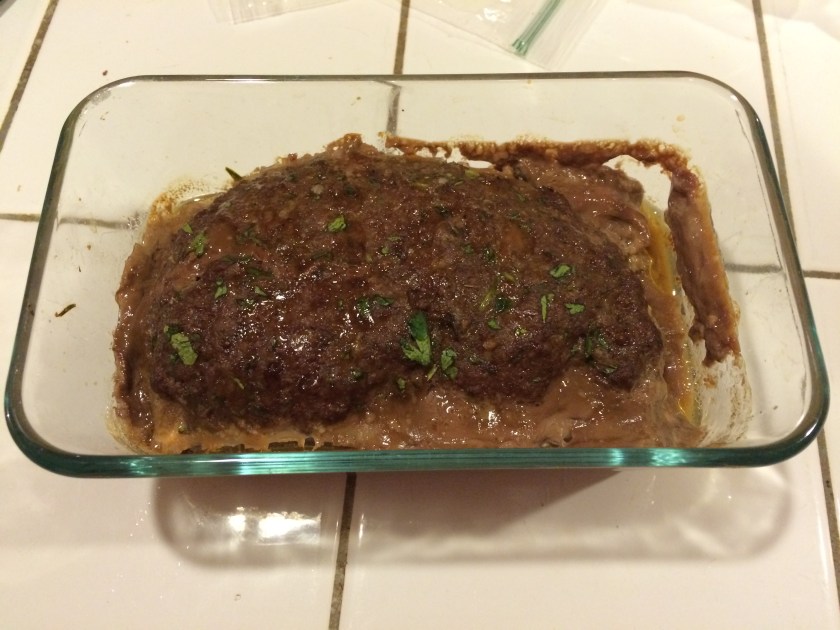
A paleo meal. Does this look boring to you?

And although there are some awesome paleo products on the market (I include several in Mythbusting the Paleo Diet), generally we just eat whole foods that we cook ourselves … with the one exception of Dave’s favorite protein bars, Pure Protein Chocolate Peanut Butter, which he loves for a snack (20 grams protein, 2 grams sugars).

Need a little inspiration? Search my blog for easy, paleo-friendly recipes (more coming soon!), or check out these 10 paleo-friendly recipes at deliciousliving.com.

3. The paleo diet can actually help the environment.

Contrary to popular thought, the paleo diet isn’t just about meat—but how you choose meat does matter. In researching the Mythbusting article, I came across the Savory Institute, a fascinating nonprofit dedicated to grassland restoration. I asked Sarah Gleason, director of marketing and communication, this question: “Given its heavy emphasis on meat, isn’t the paleo diet environmentally irresponsible?”

Her answer: “Your question is interesting in that is implies that livestock, or meat production, is bad for the environment. In fact, livestock and hooves on the ground are essential to the health of our grasslands. Without ruminant animals on grasslands, the grasslands will turn into degraded land.”

She elaborated: “Meat protein comes from herbivores (wild or domestic). These herbivores’ digestive systems are designed by nature to process cellulose (grass). They are an integral part of grasslands ecosystems throughout the world and key to their health. When herbivores are removed from the grasslands it disrupts the lands integrity. The ecosystem processes are interrupted—the dung, urine, and ground cover created by herbivores, and necessary for healthy soil, is also removed. Livestock can be a problem or a solution to land degradation. Properly managed [my emphasis] livestock on grasslands, mimicking the large, wild herds of ruminants that used to inhabit our grasslands, is essential for restoring the grasslands, sequestering carbon, food security, and water efficiency.”

Fascinating, right? That’s one reason why responsible paleo adherents preach wild game meat or truly grass-fed, organic meat. (Lucky for me, Dave is a conscientious hunter.)

What eating plan works for you, and why? I’d love to hear your comments below.


Basic meatloaf: simple, gluten-free, paleo

Meatloaf is a lot like soup: You can add just about any ingredient you like and it’ll taste great. Play around with this recipe by adding or substituting chopped roasted bell peppers, chopped mushrooms, different herb combinations (fresh or dried), even different combos of meats.

This is also easy to put together in the morning; just cover and refrigerate, then pop in the oven when you get home from work.

I use ground bison because we like the taste, it’s readily available (we buy it at Costco), and it’s a little leaner than regular ground beef; but of course you can use beef too. Basic Meatloaf is delicious with a big salad and maybe ketchup (my husband’s choice) or a dollop of Dijon mustard mixed with a little Just Mayo and dried tarragon.

This is the latest installment of my plan to record my everyday go-to recipes. (First installment: Chicken Oregano.) Click the “Follow Me” Button in the right column of my website to get an email whenever I post a new recipe.

Basic Bison Meatloaf

Serves 4

Ingredients:

2-3 large cloves garlic (you can use bottled chopped garlic but I don’t think it tastes quite as good in this recipe)

A handful of fresh parsley sprigs (to yield 1/3-1/2 cup chopped fresh parsley)

1 egg

3/4 teaspoon salt

1/2 teaspoon ground black pepper

About 1 teaspoon dried thyme or oregano (or a combination), or more to taste

1-2 teaspoons dried onion flakes (yes, freshly chopped onion is much better, but when I’m in a hurry I’ll use dried in recipes like this one, where the onion is just a slight flavoring)

About 2 teaspoons Worcestershire sauce (Lea & Perrins is gluten free)

About 2 teaspoons lemon juice (I use Santa Cruz Organic)

About 2 tablespoons gluten-free bread crumbs (This is just a binder, so use whatever you have. I make breadcrumbs by breaking up and whirling a piece of frozen/dried GF bread in a food processor. Recently I found some ancient, leftover GF pancakes in my freezer so I used one of those. You could also substitute 1 tablespoon ground flaxseed or almond meal.)

1.25pounds ground bison (buffalo) or lean organic ground beef

Directions:

  1. If you’re going to cook this right away, preheat the oven to 350 degrees.
  2. Peel the garlic; mince or squeeze through a garlic press. (If you must, you can substitute 1 teaspoon bottled chopped garlic, but I don’t think it tastes quite as good in this recipe.) Chop the parsley to yield 1/3 to 1/2 cup chopped parsley.
  3. In a medium bowl, combine the egg, salt, pepper, dried herbs, onion flakes, Worcestershire sauce, and lemon juice; whisk with a fork until well mixed. Add chopped garlic, parsley, and bread crumbs; stir until well mixed. Add ground meat and, using your hands, mix well. Form into a loaf and place in a 8×4-inch loaf pan. (If making ahead, cover and refrigerate the meatloaf all day until you’re ready to cook it.)


  4. Once your oven is preheated to 350 degrees, bake meatloaf 50-55 minutes, until cooked throughout (no longer pink in the middle). Let it sit for 2 minutes before slicing to serve. IMG_9554

That’s it! Let me know your own modifications to this basic recipe.


Homemade chicken stock

Now that you’ve made Perfect Roast Chicken, you’ve got a picked-clean chicken carcass. Don’t throw it out; make your own chicken stock! It’s incredibly easy (and gluten free), saves money, and tastes way better than store-bought broth.

If you don’t have time to make stock right away, just toss the carcass and giblets in a zip-top bag and refrigerate the whole thing for a day or two (or freeze) until you’re ready.

Ingredients:

1 chicken carcass (plus raw giblets if you have them)

Optional but really good: A couple of onion wedges, a couple of celery stalks with leafy tops, and/or a couple of carrots, cut into large chunks

5-6 whole peppercorns

1 dried bay leaf

Directions:

  1. Place the chicken carcass, plus giblets if you have them, in a pot. If possible, add a few vegetable chunks (including celery stalk leaves, which have a ton of flavor). Toss in a few peppercorns, too, and maybe a dried bay leaf. Add enough water to cover—depending on the size of your pot, that’ll be around 8-12 cups.IMG_9564
  2. Bring the pot to a rolling boil. I don’t mean just starting to bubble; I mean really rolling. Here’s what that looks like:
  3. Reduce heat to low, cover partially, and simmer for 1-2 hours. Let cool completely.
  4. Strain the stock into a bowl or large measuring cup. I measure out 4 cups (32 ounces) at a time, the amount in a typical store-bought box of chicken broth. Compost the solids; all their flavor is now infused into the water.IMG_9569
  5. Pour cooled stock into containers. I usually use gallon-size zip-top bags, which store easily and defrost quickly (see below). Simply fill and seal bags, stack flat on a rimmed baking sheet lined with a dish towel, and freeze until solid. Once frozen, you can stack the bags horizontally or vertically in your freezer. Of course you can also pour stock into a plastic or glass container and freeze or refrigerate. Whatever you do, label the containers with the amount.

IMG_9570

_IMG_9573To defrost stock that’s in a zip-top bag, lay it flat in a sink with warm-hot water, replenishing as it cools. Because of its large surface area, the liquid will defrost much more quickly than stock that’s frozen a huge block.

Easy, right? And free! Use it to make flavorful soups, sauces, and cooked grains.

Roast chicken recipe: gluten-free, paleo, and perfect every time

Perfect Roast Chicken with Caramelized Carrots

People often ask me if I have a favorite dish to cook. This is certainly a top-5 contender.

The secret, I’ve found, is the high heat (425 degrees) and the timing. If you calculate accurately—15 minutes per pound plus 15 minutes, exactly—you’ll be rewarded with a moist but cooked-through chicken with nice crisp skin. I’ve roasted a lot of chickens over the years, and this is the only method that works every single time.

A few more notes: The caramelized carrots are a delicious addition, but if you don’t have carrots, use a small metal roasting rack to lift the chicken off the pan a bit; or if you have neither, skip it. It’ll still cook just fine.

If you also want baked potatoes (and who wouldn’t?), put them in the oven at the same time as the chicken. The high temperature isn’t optimal for baked potatoes—the skins get a bit tough—but it’ll work. Or try cubed potatoes: Place in a separate pan coated with cooking spray or olive oil, toss with more olive oil and salt, and roast at 425 degrees for about 40 minutes, tossing once about halfway through the cooking time.

You don’t need to rinse and pat dry the chicken (in fact it’s safer not to), but I am obsessive about washing my hands every single time after touching the raw chicken and before handling anything else (e.g., a salt shaker).

Roasting a chicken at high heat like this will cause some splattering and smoking in your oven, but trust me, it’s worth it. You should plan to clean your oven once a year anyway.

Serves 3-4

Ingredients:

2 handfuls (or as many as you want) mini carrots, or whole carrots peeled and cut into chunks

1 (3.5- to 5-pound) whole roasting chicken (I use Coleman Organic), giblets removed from cavity if necessary

Optional: 1-2 onion wedges, 1-2 lemon wedges, leftover fresh herb sprigs (like thyme, oregano, or rosemary), a few peeled garlic cloves, etc.

Olive oil, for drizzling

Salt and pepper (I often use herbal, organic Celtic Sea Salt)

Directions:

1. Preheat oven to 425 degrees.

2. Place carrots in a 9×13-inch pan. (I love my cast-iron LeCreuset roasting pan!)

IMG_9618

3. Cut any excessive fat globs off chicken, such as around the neck and cavity openings. Sprinkle salt and pepper inside cavity; if you like, add a couple of onion wedges or other additions into the cavity (don’t pack tightly; leave some room). Cross chicken legs and secure with a silicone band or twine.

IMG_9624

4. Place chicken on top of carrots. Drizzle chicken with olive oil; rub with hands to coat chicken. Sprinkle all over with salt and pepper (regular or herbal).

IMG_9630

5. Here’s where the magic happens. Roast chicken at 425 degrees for 15 minutes per pound, plus 15 minutes. So, for example, a 4-pound chicken would roast for 1 hour, 15 minutes. A 3.5-pound chicken would roast for 1 hour, 7 1/2 minutes.

This is how perfect it looks when you take it out of the oven:

IMG_9151

6. Now, although you want to dig in right away, let it rest for 10 minutes before carving. This allows the hot juices to redistribute in the meat.

To carve, first cut off wings and legs/thighs at the joint; then slice the breast meat vertically, starting near the backbone.

Serve with caramelized onions. Yum.

IMG_9638

Chicken Oregano recipe: simple, healthy, gluten-free, paleo

This year I’m embarking on a plan to record my simplest, most frequently made, gluten-free, and usually paleo recipes.

First up:

Chicken Oregano

Serves 2-3

This is a great weeknight dish that’s easily doubled to feed more people. I originally got this recipe (like so many) from my mother-in-law, a classic and talented homemaker. I’ve since modified it a bit to reduce the oil and add more garlic salt and oregano.

Remember to always wash your hands after touching raw chicken and before touching anything else. Oh, and there’s no need to wash and pat dry chicken or any other meat before prepping it; in fact the USDA recommends against it because it actually increases the risk of spreading bacteria. Cooking, not washing, will kill any potential pathogens.

After cooking, use the extra pan drippings to drizzle in a baked potato or over cooked brown rice; you won’t need butter!

Ingredients:

1/4 cup olive oil (extra-virgin or regular)

2 tablespoons lemon juice (preferably freshly squeezed but bottled will work; I use Santa Cruz Organic)

1/2-1 teaspoon garlic salt (0r garlic powder plus salt to taste)

3-4 teaspoons dried oregano

2-3 bone-in chicken breasts (I use RedBird)

Directions:

  1. Preheat oven to 350 degrees.
  2. In a glass pie dish, whisk together olive oil, lemon juice, garlic salt, and oregano.IMG_9524
  3. Cut any excess fat globs from chicken breasts; otherwise they’ll spatter too much in the oven. Dip each chicken breast in the olive oil mixture, turning to coat both sides. IMG_9525Place in a 9×13-inch baking dish, leaving a bit of space between them so they cook evenly. Pour any remaining olive oil mixture over the pieces, scraping it out of the pie dish with your hands or a spatula.IMG_9526
  4. Bake chicken for 45 minutes.
  5. Remove chicken; spoon pan juices over the pieces. Adjust the oven rack so it’s slightly closer to the top broiler (I place mine one notch higher) and turn on broiler. Return chicken to oven and brown for 4-5 minutes under broiler, watching carefully to avoid burning.IMG_9532
  6. Serve with pan juices. Easy, right?


5 tips to choose a wedding menu

On October 18, we celebrated my daughter and new son-in-law’s wedding in Purcellville, Virginia. I could go on and on about every detail — the gorgeous setting at Shadow Creek Weddings & Events; the most beautiful wedding flowers I’ve ever seen, thanks to the unflappable Barbara Von Elm of Growing Wild Floral; the well-researched wine and all-Colorado beer selections (my husband’s job); and of course the heartwarming gathering of family and friends to witness God’s hand in uniting two wonderful young people.

But let’s not forget one thing. I’m a food writer and editor.

I wanted to be sure we fed people well. And not just well, but memorably well.

My daughter put me in charge of choosing and working with the catering and event service, which was far and away the biggest budget item for a wedding of this size (about 150 guests). After a lot of research, we settled on A La Carte Catering & Events based in Haymarket, Virginia.

Let me just say up front: Good call. I lost count of the number of people who told me that this was the BEST wedding food they had ever had. And most of it was gluten free!

Here are 5 tips to help you choose a great wedding menu and caterer.

Wedding menu and program

Menu & program designed by Sage Paper Co.

1. Go local and seasonal. As you peruse caterers’ menu options, keep in mind that your selections will be at their best if made with locally sourced, seasonal ingredients rather than out-of-season produce from another hemisphere. Don’t force fresh strawberries into a January wedding menu! ALC partners with local farms and producers, so I knew the building-block ingredients would be great.

2. Think about the crowd. Remember: This meal is a gift to your guests. If possible, arrange for a tasting so you can really get a sense of the flavors (ALC provided a full complimentary tasting lunch in June; these photos are from that event). At that time, talk over with your caterer the type of guests you expect will attend: Do you need reliably gluten-free or dairy-free options, and does your caterer even know what that entails? Will the crowd be predominantly younger or older? (Younger people tend to eat more heartily.)

For our guests and based on the bride’s and groom’s tastes, we wanted a mostly gluten-free menu that said “comfort food” rather than fancy, spicy, or exotic, with food beautifully prepared and presented but above all delicious.

beefpolentaveggiesWe decided on balanced, classic dishes with nearly universal appeal: a beef entree — braised short ribs, left, the crowd favorite — and, for guests who don’t eat red meat, a bone-in roasted chicken entree (pictured below right) because bone-in doesn’t dry out nearly as much as boneless chicken breasts, served with sweet-potato wedges (not pictured). All of the ingredients wchicken
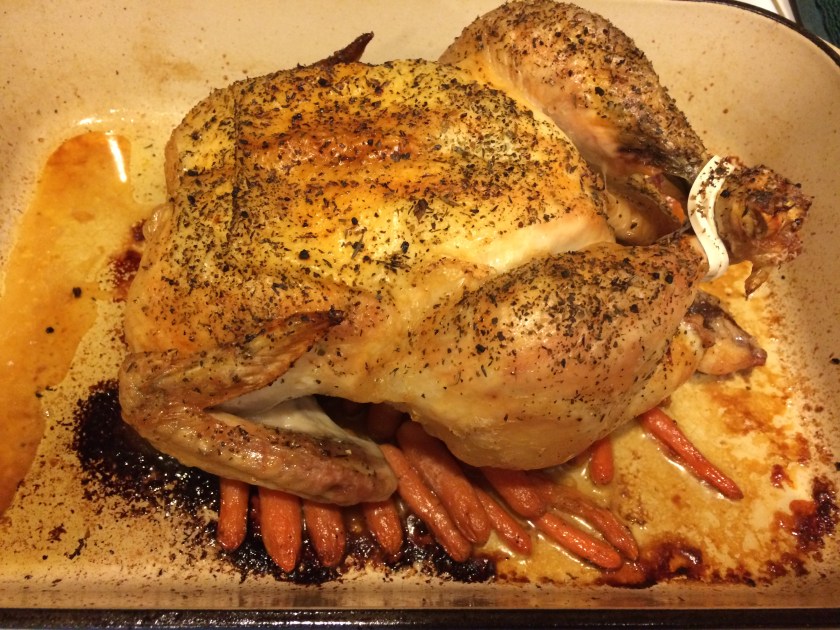
ere seasonal, gluten-free (most were also dairy-free), and hearty, perfect for a chilly October evening.

3. Play up the veggies. Most caterers will provide a special vegetarian plate for veg guests, but we elected to include a vegetarian entree in the buffet that everyone would love: an amazing Greek mac ‘n’ cheese made with fresh spinach and feta (below left). That way our vegetarian guests would have a solid entree and could also pick and choose from among the other vegetarian options on the buffet, which included a stunningly good rosemary polenta and roasted fall macncheeseveggies (both pictured above with the beef but served separately at the wedding), as well as a gorgeous harvest salad (below right).


saladcloseup4. Pay attention to the staff. You’ll be sending a lot of emails back and forth with whatever caterer you choose, so you’re going to have to like dealing with the people. Chelsea, one of ALC’s perpetually cheerful event coordinators, virtually held my and my daughter’s hand through every emailed question, every decision, every back-and-forth negotiation, and every freakout moment with grace and patience. During the reception itself, she had a look on her face that made it seem like this was the first and best wedding she’d ever been to … even though she probably does this at least three times a week.

5. Don’t skimp on labor. ALC’s budget included more staff than the other bidders — 15 total, including Chelsea, 2 bartenders, 1 chef, 1 sous chef, and 10 servers for an estimated 150 guests. At first we thought this might be overkill. But given the level of setup; cocktail, dinner, and dessert service; and takedown/cleanup, boy was I glad we had that many people. They kept the event moving seamlessly, and they did it cheerfully from start to finish.

Our final menu lineup:

Appetizers: Sweet potato cakes with duck confit; coconut-coriander shrimp (GF); twice-baked mini potatoes with truffle oil (GF) — below

appetizers

Salad: Roasted butternut squash with fuji apples, fall greens, bleu cheese, and candied walnuts, served with a lemon vinaigrette (GF, V)

Entrees: Barolo-braised beef short ribs with rosemary polenta and harvest vegetables (GF); bone-in, herb-marinated roast chicken with balsamic glaze and lightly curried sweet potatoes (GF); Greek mac ‘n’ cheese with fresh spinach, feta, and a hint of cinnamon (V)

Dessert: This was fun! Along with comfort-food theme, the bride and groom chose a dessert bar with chocolate chip, snickerdoodle, and peanut butter cookies; apple, cherry, and pecan mini pies; and farm-fresh milk served in adorable mini milk bottles with straws. For gluten-free eaters, we also ordered chocolate crackle cookies and a small wedding cake from The Happy Tart, a dedicated and awesome gluten-free bakery.

Have you planned or are you planning a wedding or other catered event? What factors were important to you? What made the experience a good (or bad) one? Share your experiences or ask questions in the comments!

Wild Duck Pate

It’s finally fall again. And my husband, Dave, is happy because fall ushers in hunting season.

I could write a lot about lessons learned while being married to a conscientious, deeply ethical, nature- and animal-loving hunter (in fact, he’s the first hunter I ever met, way back in college). But I’ll save that for another post. Suffice it to say that over the past three decades, I’ve had to learn how to cook a lot of wild game meat — mostly dove, duck, goose, and pheasant.

This Wild Duck Pate recipe is without a doubt our favorite game-meat creation to date. It’s a labor-intensive recipe, but trust me, it’s worth the effort. People go absolutely nuts for this when we serve it at parties. One guy recently asked me if I knew its street value.

Unfortunately, this recipe does not work with domestic, store-bought duck, which is much fattier and milder than wild duck … so you’ll have to make friends with a duck hunter.

Bosley’s Wild Duck Pate

3/4 pound (24 tablespoons, or 3 sticks) butter, divided (to make a slightly lighter pate, you can substitute olive oil for up to half of the butter)

1 pound skinned and boned wild duck breast (about 2 mallards), cut into bite-size chunks

1 cup sliced mushrooms (about 4 ounces)

1 teaspoon sea salt

1 teaspoon ground black pepper

1 teaspoon dried oregano

1 teaspoon dried thyme

1 teaspoon curry powder

1 teaspoon allspice

1 red apple, cored and finely chopped

1 onion, finely chopped

8 ounces hot Italian sausage (we use Boulder Sausage)

1 cup walnuts (or almonds)

2 tablespoons sherry or cognac

Juice of 1 lemon (about 2 tablespoons)

  1. In a large sauté pan, heat 4 tablespoons butter and sauté duck pieces, mushrooms, and spices until tender and cooked through. Transfer to a large bowl.
  1. In the same pan, heat 4 tablespoons butter and sauté apple, onion, and sausage until sausage is cooked through and apple and onion are tender. Add to duck mixture along with walnuts, sherry, lemon juice, and 8 tablespoons (1 stick) softened butter. Mix well.
  1. Working in batches, puree mixture in a food processor, transferring batches to a second large bowl as you go, until all is finely blended and mixed. This is important: If you hear a rough, grinding sound when you turn on your processor, stop immediately; that means there’s a shot somewhere in the mixture. You’ll have to feel your way through the entire mixture to find the tiny shot and remove. Repeat this as long as that awful noise alerts you that shot still remains.
  1. Once everything is nicely blended and smooth, divide mixture into freezer-safe containers with lids. (For this recipe, we use three 2-cup glass containers.) Melt remaining 8 tablespoons (1 stick) butter, cool slightly, and pour over pâté. Cover and freeze. Defrost and bring to room temperature before serving.